Table Cushions Being Parts of Pool Tables
When considering cushion replacement first make sure your rails are mounted tight to the table. If they are loose they may play like they’re dead.
If the rails are tight and the ball makes a thud sound or does not have an active rebound off the cushion then the cushion is either dead or dry rotted
(hard) and cushion replacement is necessary.
Make sure to select the correct cushion profile for your table. K66 is widely used. Some tables use K55 and cheaper tables may use U23.
If your cushions are not marked refer to the cushion dimensions shown.
1. Do not cut the rubber to size prior to installation. There should be some overhang at each end of the rail. Make sure you identify the Top Side
of the rubber so you are not installing it upside down. If viewing from the side, the top side of triangle shaped cushion has a very slight curvature while the bottom side is flat.
2. Before installing new cushion rubber lightly sand the rubber side that will be glued to remove any mold release residue. Clean the surface of the wood sub-rail
that the cushion will be glued to and remove any old glue residue. Laquer thinner or ketone workswell. Lightly sand the entire wood sub-rail (400 or higher grit on
a sanding block) to assure a smooth and clean surface.
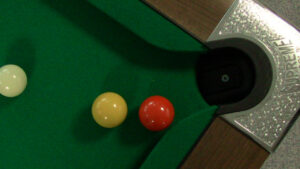
3. Measurement – test fit the new cushion by placing it on the rail and measure the distance from the nose of the cushion down to the slate When using a regulation ball set (2.25″ dia) the best performance is achieved when the nose to slate distance is 1 7/16″. If the ball set is a not regulation then multiply 63% times the diameter of the ball and this will give you the correct nose height for the cushions.
4. Apply a coating of contact adhesive (3M-10 Scotchgrip recommended) to the rubber and wood surfaces to be bonded. Follow the mfg instructions on the can.
5. It’s important to apply the rubber in a Straight line – aligning the top edge of the rubber with the top edge of the sub-rail. Do not stretch the rubber when installing but
make sure it is in contact with the wood the entire length of the rail.
6. Once the rubber is applied eyeball it lengthwise to make sure it is straight with no waves.
7. Allow sufficient glue drying time. Altho you can work faster it’s suggested to allow the the rails to sit overnight to assure the glue has cured sufficiently.
8. Trim the excess rubber so that it is flush with the mitered and flat ends of the rail. You can use a sharp razor knife, linoleum knife or some use a fine hacksaw blade.
Dipping the blade in soapy water will make the cutting easier and prevent the blade from getting stuck or binding in the rubber.
9. Once the excess cushion is removed install the cushion facings. Again, coat the facing and the end of the rail/rubber with contact adhesive. Allow sufficient glue drying
time and then trim the excess facing rubber following the contour of the rail and cushion rubber. You may choose to put 1 or 2 staples/tacks thru the facing and into
the wood part of the rail to make sure the facing doesn’t move when trimming. These can be left in.
Simonis cloth is one of the highly rated pool table cloth. It is over three centuries old and still relevant in the market. Simonis cloths are trusted by many, and…
Table Cushions Being Parts of Pool Tables.